I admit it: I’m a sucker for pocketable 35mm cameras.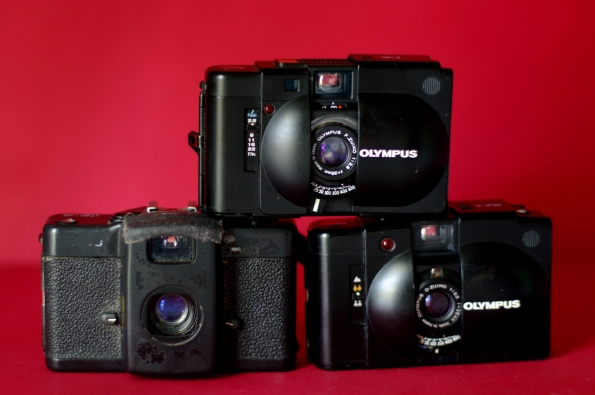 Exhibit A – I’ve owned multiples of some of these cameras. And yes, my cameras formed a cheeleader-style pyramid for this photo session
A few weeks ago, I found myself browsing the camera section of an auction website – which is not the wisest thing to do when you’re trying to pare down your camera collection like I (supposedly) am! I spotted a little camera that I’d never encountered before: a Ricoh FF-1. Visually, I knew it was eerily similar in design to the Minox 35 line. One website I read said that this camera looks as if a Minox 35 and a Lomo LC-A had a baby together. I agree! I did a fair amount of research on the FF-1 during the days leading up to the end of the auction. I found relatively little info online about this camera. But I was intrigued! I had to make the Ricoh mine!

I probably squealed with delight when the postal carrier brought the parcel containing this camera. The FF-1 looked to be in good shape cosmetically (it looked purdy to me!) and it already had working batteries installed. That’s always a nice surprise! As you can see, the auction I won also included a little Rollei flash and a cute retro-style camera bag.
So. Here’s what I can tell you about the Ricoh FF-1: It’s a zone focus (or scale focus, if you prefer – same diff) camera. That means you estimate the focus distance and set it manually. On the Ricoh, you set the distance on a little focusing ring that is marked in meters. There is a folding, drawbridge-style lens cover that protects the lens and acts as an on-off switch, if you will. When the drawbridge is in its upright position, the camera cannot take a photo nor can the camera’s electronics be accidentally activated – meaning a photo can’t be inadvertently snapped nor your batteries drained if the shutter button were to somehow get pressed (in your camera bag, for instance.)
 Drawbridge action
 Film speed selector
 Metal lens barrel with distance scale ring (marked in meters) – and it is QUALITY!
 Handy dandy meter/feet conversion chart. Phew!
The Ricoh actually arrived on a very good week: Kayla happened to be Stateside, visiting her family, and I’d been invited over for a bake date. What a good opportunity to bring along my latest photographic acquisition! I was right that our bake date would be a photo-rich environment- except my rusty scale focusing skills caused a few shots to not turn out the way I wanted. Boo! But we still got a few keepers that day!
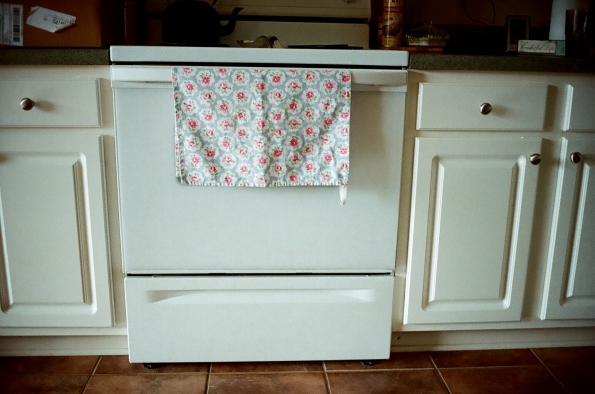 Loved the soft light in Kayla’s mum’s kitchen – and her Cath Kidston tea towels
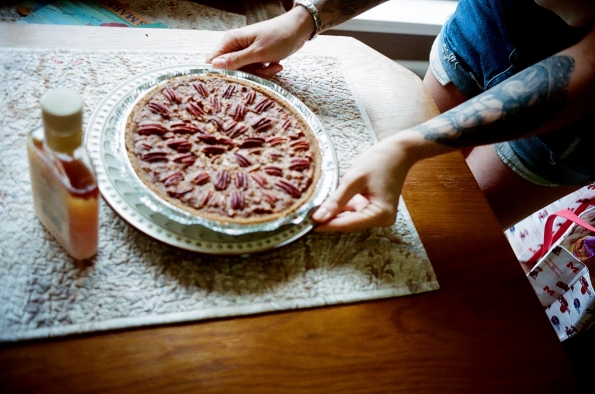
 Mixing up the bourbon pecan pie she was making for her family reunion
 Just Kayla is in focus, but I kinda like how it looks as if she’s dancing in her seat as she eats her Ajax Diner leftovers
 Kayla prepping for the “food porn” shoot of her completed pecan pie – almost in focus!
I had loads more success with Roll #2 in the FF-1!
 Slight vignetting?? I sure hope so!
 Lomo-ish?
 See – it’s quite sharp when you focus correctly
 Hiya! I have to be able to take mirror self-portraits with the compact cameras in my life
 Weird frame overlap thingy – this is the only time this happened and mos def due to what I like to call “operator error”
 Bokeh, bo-kay?
Ricoh FF-1 • Kodak Ultramax 400
Closing thoughts: The main question in my mind about this camera was (and remains): Does it work as an aperture priority camera? There is conflicting information about this online, and I still am not 100% convinced that you can’t use aperture priority. However, I view this camera as a replacement for my Olympus XA2 and my no longer working Lomo LC-A, and neither of those cameras offer anything other than auto exposure. So no biggie if the Ricoh doesn’t work that way either. In fact, any limitations in the Ricoh can also be found in one or both of the two cameras I just mentioned. So I can’t fault the FF-1 for any limitations it shares with the cameras it’s replacing, now can I??
What I like about this camera:
- maximum aperture of f/2.8
- “drawbridge” lens cover
- quality metal lens barrel
- film advance lever (♥ this a lot!)
- hot shoe
- threaded cable release plug
What I don’t so much like:
- Maximum ISO setting of only 400
- Minimum focusing distance of 3 feet
- Setting the distance is a bit fiddly on the itty bitty lens barrel
- The viewfinder on my particular FF-1 is a little foggy – could be cleared up probably, but I won’t take it apart myself to do it!
That’s about it on the “cons”! As I said, apparently I’m a little rusty on zone focusing, but I have mastered it in the past and shall do again! I think the Rioch FF-1 has earned its spot on my “Going to England” camera list. And directly caused my XA2 to earn a spot in the “excess camera sell-off on eBay.”


 Festive shop window
 Pretty seafoam/turquoise-y railing


 First photo taken with my new camera – I then accidentally dropped and broke the lid to my sister’s glass pumpkin jar. Womp womp.
 Goldenrod
  Balloon dart game at my niece’s school carnival
 “All I Want for Christmas is My Two Front Teeth” Club, guests at my niece’s birthday party
 Red leaf on a rainy day
 My divot-y French press coffee and homemade baked donut
 Baked pumpkin donut on one of my favorite saucers
 For a new photo series I’m starting – more on that later
